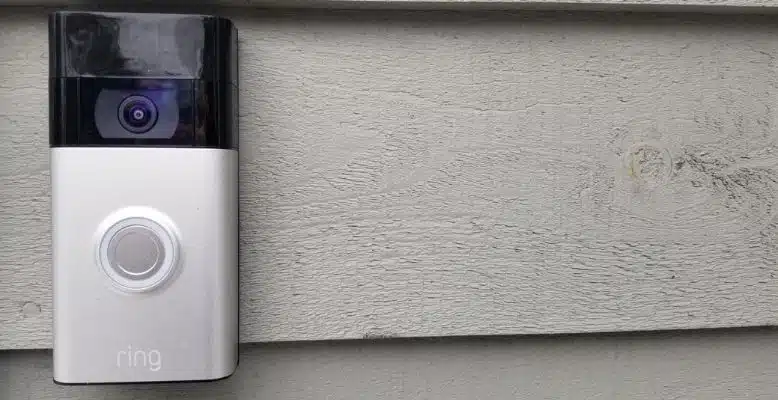
The Ring Video Doorbell 2 is discontinued – Ring killed it around 2020 – but millions are still mounted on front doors, and plenty turn up used for $30-50. If you’ve got one and need to put it up, this is the complete installation guide. No fluff, just the steps that actually matter.
If you’re shopping for a new unit instead, skip ahead to the bottom where I recommend the current equivalent. For everyone else: let’s get it on the wall.
What Comes in the Box
Ring includes everything you need for a basic mount. Before you start, confirm you have:
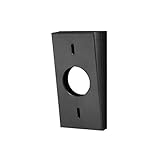
- Mounting bracket (the backplate)
- Mounting screws and wall anchors (both masonry/wood sizes included)
- Level sticker (small stick-on level to help you get it straight)
- Micro-USB charging cable
- Security screwdriver (T6 Torx star-headed bit – keep this, you’ll need it every time you remove the doorbell)
You’ll also need a drill, a Phillips head screwdriver for the mounting screws, and a tape measure. That’s it for a battery-powered install. Wired is the same plus a screwdriver for your chime’s terminal screws.
How High to Mount the Ring Doorbell 2
Ring’s official recommendation is 48 inches (4 feet) from the ground. Not 48-53 inches, not “eye level” – 48 inches is the sweet spot for the camera’s motion detection zone. Too high and it misses feet-level activity; too low and it triggers on every dog and kid on a bike.
If your door frame doesn’t cooperate at exactly 48 inches, angle wedges and corner kits (sold separately – see the mounting accessories section below) let you adjust the detection zone without moving the bracket.
Installation Options
There are two ways to power the Ring Doorbell 2:
- Battery only – Charge the removable battery, snap it in, mount the doorbell. When the battery gets low (Ring will notify you), pop the doorbell off, charge via micro-USB, reinstall. Takes about 5-10 hours for a full charge.
- Wired to existing doorbell – If you have existing doorbell wires (8-24 VAC), connect them to the doorbell’s terminals. This trickle-charges the battery continuously so you never have to remove it to charge. Note: the Ring Doorbell 2 does NOT require a Pro Power Kit – that’s for the Pro models. Just wire the two existing doorbell wires to the back terminals. Full hardwiring guide here.
Most installs are battery-only. If you have existing doorbell wires, wired is better – you stop thinking about charging entirely.
Step-by-Step Installation
The correct order matters here. Ring’s instructions have you mounting the bracket first, which is fine – but charging the battery first means you’re not half-installed waiting on a USB cable.
Charge the battery first
Remove the battery from the doorbell (press the release tab on the back). Connect the included micro-USB cable to the battery and plug into any USB power source. The battery LED glows red while charging, solid green when full. A fully drained battery takes 5-10 hours. Do this before anything else so you’re not waiting mid-install.
Download the Ring app and create your account
Install the Ring app (iOS or Android) and set up your account before going outside with a drill. The app walks you through device setup and will prompt you to scan the QR code on the back of the doorbell – easier to do indoors. Get the device added to your account now so the outdoor steps are just mounting.
Mark the mounting location at 48 inches
Measure 48 inches up from the ground on your door frame or beside the door. Mark the center of where the bracket will go. Use the included level sticker on the bracket to ensure it’s straight before marking drill holes.
Mount the bracket
Drill pilot holes at the marked positions. Use the included wood screws for wood surfaces, or masonry anchors for brick, stucco, or concrete. Screw the mounting bracket to the wall with a Phillips head screwdriver. Pull it firmly – this bracket takes the weight of the doorbell and should not flex.
Connect wires (wired installs only)
If you’re hardwiring to an existing doorbell system, disconnect power at the breaker first. Connect the two doorbell wires (polarity does not matter) to the screw terminals on the back of the bracket. Tighten firmly. Turn power back on at the breaker. If you have an indoor mechanical chime, it should still ring normally.
Snap the doorbell onto the bracket
Align the doorbell with the mounting bracket and slide it downward onto the bracket until it clicks into place. The doorbell seats onto the bracket from above – there’s a definitive click when it locks.
Secure the security screw
Use the included T6 Torx security screwdriver to drive the security screw into the hole at the bottom of the doorbell. This screw prevents the unit from being lifted off the bracket. Hand-tight is fine – don’t overtighten or you’ll strip the small hole.
Complete setup in the app
Open the Ring app and finish the device setup. Connect to your Wi-Fi network, set your motion detection zones, and test the live view. Press the doorbell button from outside to confirm you get a notification on your phone. Done.
Mounting Accessories
The Ring Doorbell 2 mounts flat against a wall by default. If your door isn’t positioned perfectly for that (most aren’t), these accessories fix the angle problem:
- Angle wedge kit – Tilts the doorbell left, right, up, or down to aim the camera at approaching visitors rather than at a blank wall. Ring’s official wedge kit is the cleanest option.
- Corner kit – Mounts the doorbell on the corner of a wall or column, angling it 90 degrees to cover an entryway. Ring’s corner kit is purpose-built for this.
- No-drill adhesive mount – For rentals or situations where you can’t drill. This adhesive mount works on wood, vinyl, and brick. Not as secure as screws, but fine for most situations.
- Solar charger – Mounts above the doorbell and keeps the battery trickle-charged via solar. Good for houses with south-facing front doors that get real sun exposure. Ring’s Doorbell 2 solar charger connects directly. See our full solar charger guide.
Mounting on Different Surfaces
Wood: Use the included wood screws. Pre-drill if the wood is hard or you’re close to the edge. Standard install.
Brick or concrete: Use the included masonry anchors. Drill with a 3/16-inch masonry bit, insert the anchors, then drive the screws. The included screws seat well in the anchors.
Vinyl siding: Vinyl compresses under screw pressure and can crack if you overtighten. Use a 1/4-inch bit for pilot holes and screws designed for vinyl, or go with the adhesive mount to avoid the siding entirely.
Stucco: Same approach as brick – 3/16-inch or 5/32-inch masonry bit, masonry anchors. Stucco can chip when drilling, so slow speed and firm pressure beats fast drilling.
FAQ
What size is the Ring Doorbell 2 security screw?
The Ring Doorbell 2 uses a T6 Torx security screw (the tamper-resistant star-headed type). Ring includes the correct T6 Torx driver in the box – do not lose it. T15 is used on newer Ring Pro models; T6 is correct for the Doorbell 2.
How do I remove the Ring Doorbell 2 from the bracket?
Use the included T6 Torx driver to remove the security screw at the bottom of the doorbell. Then grasp the unit near the bottom and lift up and out. It releases from the bracket by sliding upward. To reinstall, slide it back down onto the bracket and replace the security screw.
Do I need a Pro Power Kit for the Ring Doorbell 2?
No. The Pro Power Kit is for Ring’s Pro-series doorbells when used with an existing mechanical chime. The Ring Doorbell 2 just needs two wires from an 8-24 VAC transformer connected to the back terminals – no additional hardware required.
Can I install two Ring Doorbells on the same account?
Yes. Each doorbell gets its own mounting and power source, but multiple units link to the same Ring account and app. See our guide on running two Ring doorbells for the setup details.
Is the Ring Doorbell 2 still supported in 2026?
Ring’s software security update policy covers devices for four years from purchase date. If your Doorbell 2 was bought in 2022 or later, you’re likely still within that window. Units bought earlier may no longer receive updates. Check the Ring app under Device Settings for your current firmware version.
Looking for a Current Model?
The Ring Doorbell 2 is solid hardware but it’s been out of production since 2020 and the camera resolution (1080p) shows its age compared to newer models. If you’re buying new rather than reusing what you have, the Ring Battery Doorbell Plus is the direct successor – it adds Head-to-Toe HD+ video (1536p, wider field of view that captures packages on the ground) and improved motion detection, and it installs the same way.
For more on the Doorbell 2 specifically: read our full review, or if you’re wiring it up to an existing chime, the hardwiring guide covers everything in detail.