Blink cameras only work on 2.4GHz WiFi. Not 5GHz. If you try to connect to a 5GHz network during setup, it won’t work – and the app won’t tell you why. That’s the number one reason people get stuck. Get on the right band first, then set up the camera.
Once you’re on 2.4GHz, the process takes about five minutes.
Before You Start
You need three things before opening the app:
- A 2.4GHz WiFi network (non-cellular, minimum 2 Mbps upload speed)
- The Blink Home Monitor app installed on your phone (iOS or Android)
- A Blink account – create one free in the app
- Batteries installed in the camera
- A Sync Module (required for Outdoor 4, Indoor 4, and most other models – not needed for Mini 2)
On the 2.4GHz band: most modern routers broadcast both 2.4GHz and 5GHz with the same network name. During setup, your phone needs to be connected to the 2.4GHz band specifically. If your router uses a single combined SSID, check your router settings and temporarily separate them, or move your phone closer to the router (5GHz drops off faster, so at close range you may auto-connect to 2.4GHz).
How to Connect a Blink Camera to WiFi
Open the Blink app and tap the + icon
Tap the plus icon in the top right corner of the home screen, then select “Add Device.”
Select your camera model
Choose your camera from the list – Outdoor 4, Indoor 4, Mini 2, Video Doorbell, etc. The app will walk you through model-specific steps from here.
Set up the Sync Module first (if required)
Most Blink cameras require a Sync Module. Plug it in near your router. Wait for the light pattern: solid green + blinking blue. Then scan the QR code on the back of the Sync Module, or enter the serial number manually.
Connect the Sync Module to your WiFi
Tap “Discover Device” when prompted. The app will ask you to select your WiFi network from a list and enter your password. Select your 2.4GHz network. This is where most connection failures happen – if you don’t see your network or it keeps failing, confirm you’re looking at the 2.4GHz band.
Add your camera
Once the Sync Module is connected, tap “Add Blink Camera.” Scan the QR code on the back of the camera. Assign the camera to the system you just set up and give it a name (“Front Door,” “Backyard,” etc.).
Wait for confirmation and tap Done
The camera will register with the system. When you see the success screen, tap Done. Your camera should now appear on the home screen as live.
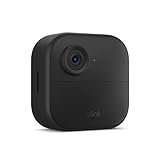
The Blink Outdoor 4 is the current flagship outdoor model if you’re shopping:
Common Connection Issues
Camera won’t connect – most likely a 5GHz problem
Blink cameras physically cannot connect to 5GHz networks. If setup keeps failing with no clear error, this is the first thing to check. Look at your phone’s WiFi settings – if your router shows one combined network name, split the bands in your router admin panel before continuing.
Camera connects but drops off repeatedly
Usually a signal strength issue. Blink requires at least 3 bars of signal. The camera needs to be within about 100 feet of the router (or Sync Module). Walls, thick concrete, and interference from other devices all reduce range. A Sync Module placed closer to the camera can help – the camera connects to the module, not directly to the router.
Password rejected during setup
The Blink app is case-sensitive and doesn’t always show what you’re typing. Re-enter the password slowly. Special characters in passwords occasionally cause issues – if you keep failing, try temporarily setting a simple password on your router to complete setup, then change it back.
Camera shows flashing red light
A flashing red light usually means the camera lost its connection. Reset the Sync Module (hold the reset button with a paperclip until it reboots), then try re-adding the camera through the app.
Sync Module offline
If your Sync Module keeps going offline, we have a full guide on fixing Blink Sync Module WiFi issues that covers the common causes.
Model-Specific Notes
Blink Outdoor 4 and Indoor 4
Both require a Sync Module 2 (included in starter kits, sold separately for add-on cameras). The setup flow above applies directly. 2.4GHz only.
Blink Mini 2
The Mini 2 is the exception – it connects directly to WiFi without a Sync Module. Plug it in, add it in the app, and connect to your 2.4GHz network. Still 2.4GHz only. See the full Blink Mini setup guide for step-by-step instructions.
Blink Video Doorbell (1st Gen)
The original Video Doorbell can connect to WiFi directly without a Sync Module, though using one significantly improves battery life and unlocks always-available Live View. Without a Sync Module, Live View is only accessible within 60 seconds of a motion or doorbell press notification.
Blink Video Doorbell (2nd Gen)
The 2nd Gen Video Doorbell requires a Sync Module to function. It won’t work as a standalone device. See the full Blink Doorbell installation guide for wiring and setup details.
How to Change WiFi on a Blink Camera
Got a new router or changed your network name? You’ll need to update the Sync Module’s connection, not the individual cameras (they talk to the module, not the router directly).
- Open the Blink app.
- Tap the cloud icon in the bottom left of the home screen.
- Select “Change WiFi Network.”
- Have your Sync Module serial number, new network name, and password ready, then tap “Ready.”
- Scan the QR code on the Sync Module.
- Wait for the blinking blue and solid green lights (up to 30 seconds), then tap “Yes.”
- Select your new 2.4GHz network, enter the password, and tap “Join.”