Setting up a Blink Mini is one of the simpler smart-camera jobs: install the app, scan the QR code on the bottom of the camera, type your Wi-Fi password, wait for a solid blue LED. The whole flow takes about three minutes if your Wi-Fi cooperates, and the same steps apply across the Mini 2, the Mini 2K+, and the original Mini Gen 1.
What you need before you start
- A Blink account (free; you’ll create it during the app onboarding if you don’t already have one).
- The Blink Home Monitor app installed on iOS or Android, signed in.
- A 2.4 GHz Wi-Fi network. The Mini cameras do not connect to 5 GHz, and on dual-band routers with band steering enabled, that’s the most common reason setup fails. More on this below.
- The camera, its USB cable, and the supplied power adapter. The Mini Gen 1 uses micro-USB, the Mini 2 and Mini 2K+ use USB-C. Either way, you need mains power – there’s no battery option on any Mini.
- Your phone’s camera permission granted to the Blink app (it scans a QR code during setup).
Which Mini do you have?
Blink currently sells three plug-in Minis, and the setup flow is functionally identical across all of them. Knowing which one you’ve got just matters for the LED behavior and the accessory ecosystem:
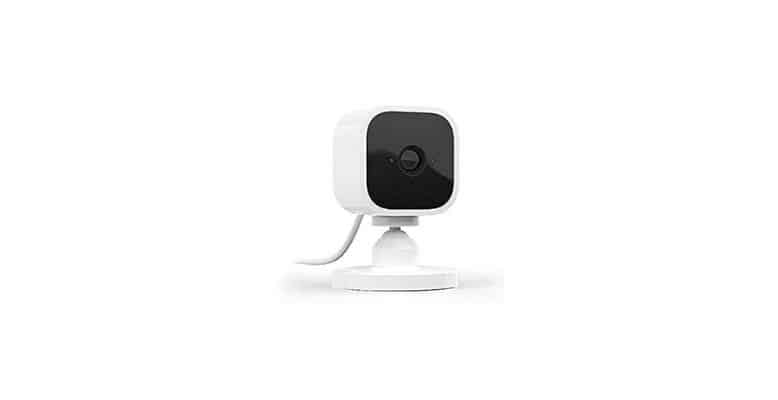
- Blink Mini 2K+ – released September 2025. 2K resolution, color night vision, built-in spotlight, vehicle detection, and IP65 outdoor rating when paired with Blink’s Weather Resistant Power Adapter. The current flagship.
- Blink Mini 2 – 1080p, color night view with spotlight, two-way audio. Cheaper than the 2K+ and totally adequate for most indoor jobs.
- Blink Mini (Gen 1) – the original 1080p plug-in. Still on sale, mostly as the budget option. It’s the only Mini that’s compatible with the Blink Mini Pan-Tilt Mount, which is technically an accessory rather than a separate camera. If you’ve got the Pan-Tilt setup, that’s a Gen 1 sitting on top of a motorized base.
If you bought a “Mini Pan-Tilt” bundle, you’re really setting up a Gen 1 Mini that then talks to the Pan-Tilt base. Two pairings, in that order.
Create your Blink account first
If you already have a Blink account from a previous camera, skip this and jump to the pairing section. If not, the app walks you through it and the whole thing takes under a minute.
Install the Blink Home Monitor app from the App Store or Google Play.
Open the app and tap Create Account.
Enter your country, email address, and a password. Confirm the email and phone verification codes when they arrive.
Add a phone number for two-factor authentication. Blink requires this; you can’t finish setup without it.
Pair the camera (Mini 2, Mini 2K+, or Mini Gen 1)
Pairing is identical across all three plug-in Minis. The only differences you’ll notice are which USB cable is in the box and how the LED looks on the front.
Plug the camera into mains power using the supplied cable and adapter. Don’t try to power it off a low-output USB hub; the Mini cameras want a real 5V adapter.
Wait about 30 seconds. The LED on the front will go through a startup sequence, then settle on solid green plus blinking blue. That combination means the camera is in pairing mode.
In the Blink app, tap the + icon in the top right of the home screen, then tap Mini Cameras and pick your model.
Scan the QR code on the bottom (or back, on Mini 2 and 2K+) of the camera with your phone. If the scan won’t work, tap the option to enter the serial number manually.
Either add the camera to an existing Blink system or create a new one (the system is just a named group of devices, like Home or Cabin).
Tap Discover Device. Your phone briefly joins the camera’s temporary BLINK-XXXX network. iOS will prompt you to Join; tap Join.
Select your 2.4 GHz Wi-Fi network and type the password carefully. This is where setup most often goes wrong – typos are silent until pairing fails.
Wait for the camera to join, update its firmware if needed, and confirm. The LED will end on a solid (or off) state, not flashing.
Give the camera a name and tap Done. You’re live.
LED states to recognize during setup
The LED on the front of the camera is the only feedback channel it gives you. Memorize these four states and you can debug 90% of setup failures without opening the app:
- Blinking red – the camera is starting up. Normal for the first 30 seconds after plugging in.
- Solid green plus blinking blue – pairing mode. Ready for the app to discover it.
- Solid blue – live view or recording motion. After setup, this is what you’ll see when the camera is actively capturing.
- Solid red – it can’t reach your Wi-Fi, or you typed the password wrong. See the troubleshooting section below.
We’ve got more granular breakdowns of the red light states and the green light states if you need them.
If pairing fails
About one Mini setup in five hits a snag. The cause is almost always one of four things, in this rough order of likelihood:
- 5 GHz auto-roam on your router. If your network advertises one SSID for both bands and the router decides your phone gets 5 GHz, the camera can’t join the same network as your phone during the discover step. Fix: temporarily split the bands in your router admin (or disable band steering), connect the camera to the 2.4 GHz SSID, then re-enable steering if you want.
- Wrong Wi-Fi password. Boring, but it’s the single most common cause of a solid red LED at the end of setup. Re-enter and watch the case of every character.
- Weak signal where the camera is plugged in. Mini cameras want roughly -65 dBm or better. If you’re stretching to a far corner of a stucco wall, walk closer to the router for the initial pairing, then move the camera back.
- The camera didn’t reach pairing mode. If you never see the solid-green-plus-blinking-blue state, factory reset the camera with a paperclip on the small button (back of the Mini Gen 1, side of the Mini 2 and 2K+). Hold for at least five seconds, then start the app flow over.
Setting up the Mini Pan-Tilt
The Pan-Tilt is a motorized base for the original Mini (Gen 1) – it’s not a separate camera. You set up the camera first, then dock it on the base and add the base in the app. The base then handles the actual pan/tilt commands when you swipe in the live view.
Pair the Mini Gen 1 by itself first, using the steps in the pairing section above.
Unplug the Mini, dock it into the Pan-Tilt base, and plug the Pan-Tilt’s USB into mains power instead.
In the Blink app, open the Mini’s settings and tap Pan-Tilt – then Set Up. The app pairs the base to the camera.
Let the calibration run. The base will rotate and tilt through its full range automatically. This takes about 30 seconds and you should leave it alone while it happens (don’t grab the camera).
If the app shows a calibration alert later, repeat manually: Camera settings, then Pan-Tilt Settings, then Calibrate Pan-Tilt Mount.
The Pan-Tilt mount is Mini Gen 1 only. The Mini 2 and Mini 2K+ won’t fit and the app won’t pair them with it – if you want pan/tilt and you have a Mini 2, you’re out of luck for now.
Using a Mini outdoors
The Mini 2K+ is officially rated IP65 when used with Blink’s Weather Resistant Power Adapter (sold separately). That’s the only Mini you can put outside without voiding the warranty. The Mini 2 and Mini Gen 1 are both indoor-only; people do mount them on covered porches with the original adapter, but if rain reaches the camera it dies and Blink won’t replace it.
If you need a real outdoor camera, the Outdoor 4 or Outdoor 2K+ is the right answer, not a Mini in a third-party housing.
Post-setup configuration worth doing
The defaults work, but they’re not great. Five minutes of tuning saves you a month of irrelevant motion alerts.
Set motion zones. In the camera’s settings, tap Motion Detection then Activity Zones, and grey out the areas you don’t care about – sidewalks, neighbors’ windows, that one ceiling fan that triggers a clip every two minutes.
Adjust clip length. Default is 30 seconds. For most indoor jobs, 10 to 20 seconds is plenty and saves you scrolling through clip lists.
Decide on the subscription. The Blink Basic Plan is the only way to get cloud clip storage; without it, your Mini does live view and motion alerts only. Read more in our breakdown of whether Blink cameras require a subscription.
Link to Alexa for voice control. In the Alexa app, add the Blink skill, sign in with your Blink credentials, and discover devices. You’ll then be able to say things like Alexa, show me the kitchen camera.
Turn off the recording LED if it bothers you. Camera settings, Status LED, set to Off. The camera still records; you just stop advertising it.
Detailed reference: recommended Blink camera settings, and do Blink cameras require a subscription.