
This post contains affiliate links. If you buy through them, DumbSwitches may earn a commission at no extra cost to you. See our full disclosure.
Blink makes two cameras with genuine wired power: the Blink Wired Floodlight Camera (hardwired into your home’s electrical box) and the Blink Mini 2 (powered by USB-C cable). Every other Blink camera – Outdoor 4, XT2, Doorbell – runs on batteries. Third-party USB power cables exist for the battery models, but that’s continuous charging, not true hardwiring. Blink also sells its own official continuous-power adapter for some battery models – more on that below.
Here’s the wiring reality by model, then how to set up each option.
Per-Model Wiring Reality
| Model | Power source | Sync Module required | Continuous power option |
|---|---|---|---|
| Wired Floodlight Camera | Hardwired AC (100-240V) | No | Built in – it’s always on, no cable needed |
| Blink Mini 2 | USB-C only, no battery | No | Included cable and adapter; official weather-resistant adapter for outdoor mounting |
| Blink Mini (1st gen) | USB only, no battery | No | Standard USB power, indoor use only |
| Blink Outdoor 4 | 2x AA lithium battery | Yes | Official Blink Weather-Resistant Power Adapter available – batteries stay in as backup |
| Blink XT2 / XT | 2x AA lithium battery | Yes | Blink documents USB power through the port under the rubber cover, but removing that cover voids the weather seal – no official weatherproof cable exists for these two |
| Blink Video Doorbell (battery) | 2x AA lithium battery | Yes | No official continuous-power cable – third-party only |
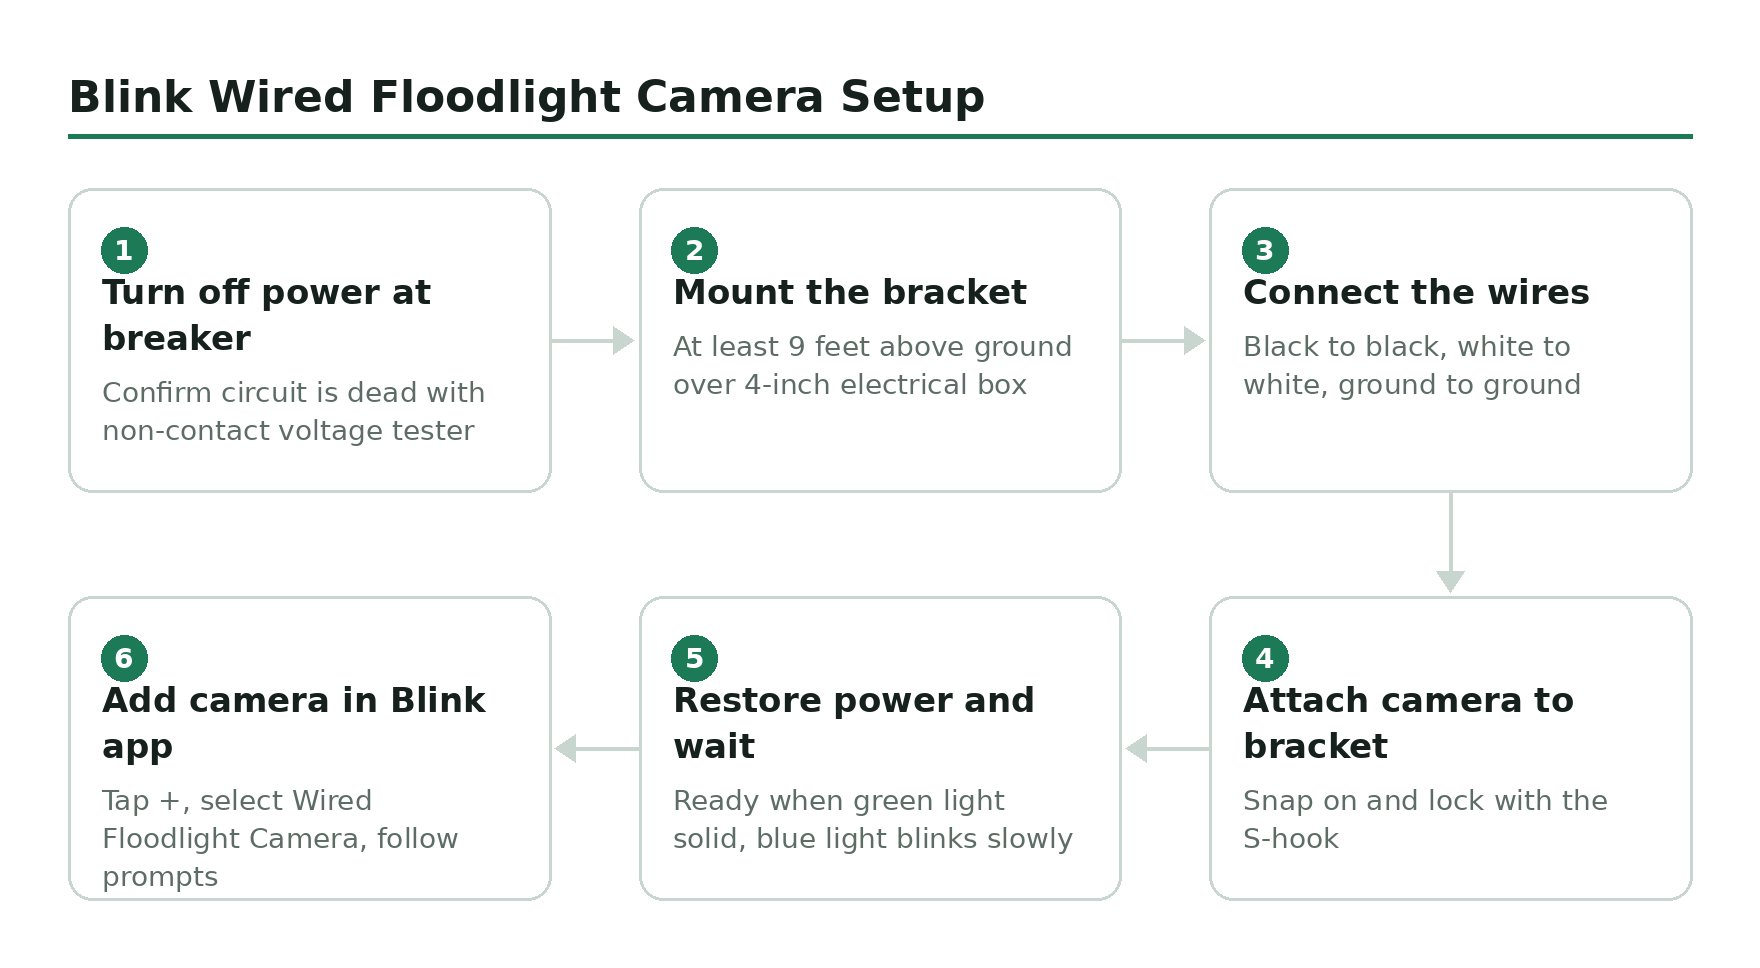
Blink Wired Floodlight Camera Setup
The Blink Wired Floodlight Camera hardwires directly into an existing outdoor electrical box – same wiring job as replacing a standard light fixture. It draws 100-240V AC, so it has continuous power and skips the Sync Module entirely (clips upload to Blink’s cloud directly). You get 2600 lumens of LED floodlight, 1080p video, motion-triggered lighting, and a built-in siren.
It requires a 4-inch round, UL-listed, weatherproof outdoor electrical box. If you don’t have one at your install location, run conduit or hire an electrician first.
Turn off power at the breaker
Cut power to the circuit at your breaker panel before touching any wiring. Use a non-contact voltage tester to confirm the circuit is dead.
Mount the bracket
Position the metal mounting bracket over your 4-inch outdoor electrical box at least 9 feet (2.7m) above the ground. Secure with the included screws using a handheld screwdriver.
Connect the wires
Match black to black (hot), white to white (neutral), and connect the green or bare copper ground wire to the fixture’s ground. The ground connection is required – do not skip it.
Attach the camera to the bracket
Snap the Wired Floodlight Camera onto the mounting bracket and lock it in place using the S-hook.
Restore power and wait for indicator lights
Turn the breaker back on. The camera takes a moment to boot. It is ready when the green light is solid and the blue light blinks slowly.
Add to the Blink app
Open the Blink Home Monitor app, tap the + icon on the home screen, and select Wired Floodlight Camera. Follow the in-app prompts to name the camera and configure motion zones.
Blink Mini 2 USB-C Power Setup
The Blink Mini 2 is USB-C only – there is no battery. The box includes a USB-C cable and an indoor power adapter. For outdoor use, you need the weather-resistant power adapter (included in the outdoor bundle, or sold separately). The Mini 2 will run off any USB-A or USB-C power source at 5V/1A or better. Like the Floodlight, it manages its own connection and doesn’t need a Sync Module.
Choose your power source location
For indoor use, any standard outlet works. For outdoor use, route the included weather-resistant USB-C cable through a wall grommet or around a door frame to reach an indoor outlet, or use an outdoor weatherproof outlet box.
Mount the camera
Use the built-in mount or the included mounting hardware to position the camera. The Mini 2 has a magnetic base that attaches to the included mount plate – screw the plate to the wall, then attach the camera.
Plug in and power on
Connect the USB-C cable to the camera and plug the power adapter into the outlet. The camera boots in about 30 seconds.
Add to the Blink app
Open the Blink Home Monitor app, tap + on the home screen, and select Mini 2. Scan the QR code on the back of the camera to add it to your system.
Can You Hard-Wire Battery Blink Cameras?
No – not officially, and they all need a Sync Module to talk to your Wi-Fi regardless of how they’re powered. The Blink Outdoor 4, XT2, and Doorbell all run on AA lithium batteries. Blink does not make a hardwire kit for these cameras.
What Blink does sell officially, for the Outdoor 4 specifically: a Weather-Resistant Power Adapter (about 13ft, IP67-rated) that plugs into the camera and an outlet for genuine continuous power. Blink’s own guidance is to leave the batteries installed as a backup even when running on this adapter, so outages don’t take the camera offline. It’s not hardwiring in the electrical sense, but it is Blink’s own hardware, not a third-party workaround.
The XT2 is a different story. Blink documents powering it via the USB port hidden under the rubber weather cover, but says plainly that removing that cover means the camera is no longer weather-resistant. There’s no official weatherproof cable for the XT2 the way there is for the Outdoor 4 – your options are exposed USB power or a third-party cable, like the Wasserstein or Itramax options on Amazon, that route around the same problem. Either way, this is continuous charging, not true hardwiring – the battery is still the power source, just kept topped up. For a clean permanent install, the Wired Floodlight Camera is the better call.
Which Option Actually Fits Your Setup
If you’re starting from scratch and want to never think about batteries again, buy the Wired Floodlight Camera or the Mini 2 and skip the battery models entirely – both run on genuine continuous power with no Sync Module to manage. If you already own an Outdoor 4 and don’t want to rewire anything, Blink’s official Weather-Resistant Power Adapter is the closest you’ll get to hardwiring without an electrician, and it’s worth the money over a generic USB cable because it’s built and sealed for outdoor use. The XT2 is the one case where there’s no clean official answer – either accept battery swaps, or accept that a USB cable means the weather seal is compromised at that port.