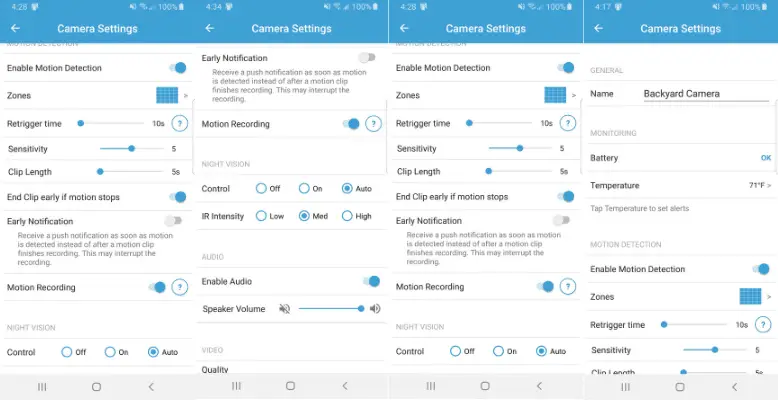
So, you just got yourself a Blink security camera, huh? Congrats! These bad boys come packed with fun settings you can tweak to your heart’s content.
We’re talking about video quality, motion detection, night vision, and more. But let’s dive into the cream of the crop, the must-use settings that’ll have your Blink camera poppin’!
Here's what we cover:
Getting The Most Out Of Your Blink Camera Settings
You want to ensure you’re getting the most out of it and squeezing every last drop of awesomeness out of it, right? Don’t worry, I got you. These cameras have many fantastic settings you can play around with to make it even more epic. And sure, the default settings are already pretty rad, but why settle for good when you can have extraordinary? Let’s tweak some stuff and make it your own!
Naming Your Camera
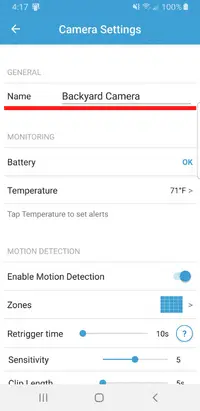
Giving your camera a proper name is critical, my friend! Trust me, you don’t wanna be scratching your head tryna figure out which camera is which, so give it a name that pops out to you.
For instance, if you got a camera guarding your front door, why not name it “Front Door Sentry”? And if you got a sneaky one watchin’ the backyard, call it “Backyard Spy.”
This might seem a no-brainer, but you’d be surprised how many peeps don’t do it. So, take a sec and give your cameras some love with a fitting name – it’ll save you a bunch of headaches in the long run.
Activity Zones
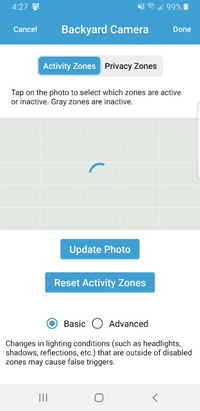
Have you ever been bombarded with notifications from your security camera, only to find out it’s just a tree branch swaying in the wind? Ain’t nobody got time for that, right? Don’t sweat it because, with an activity zone, you can control what triggers your camera’s recording.
Think of it like creating a VIP list for your camera. You can define a specific area that’ll only set off the motion detection, and anything outside that zone will be ignored. So, if you want to keep an eye on your backyard but don’t want the camera going off every time the flag flaps, exclude that area from the activity zone. Easy peasy!
Not only will this cut down on false alarms, but it’ll also help save battery life. It’s a win-win situation, so what are you waiting for? Start setting up those activity zones!
Motion Detection Sensitivity Settings
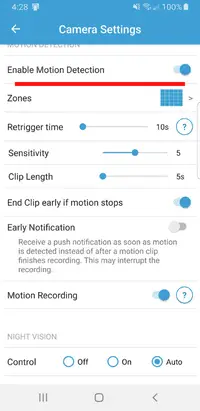
Motion detection sensitivity level determines how much movement is needed to trigger the camera to start recording.
Setting it too high can mean the camera gets triggered too quickly from swaying trees or bushes in the wind.
I like to put this setting right in the middle of the slider, but you may want to experiment with it to get the correct settings for your environment.
Retrigger Time
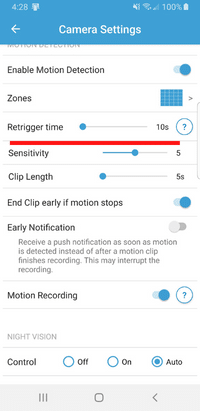
Let me break it down for you – the retrigger time is just a fancy way of saying the gap between each recorded video clip. Blink allows you to choose between 10 seconds and one whole minute.
The 10-second setting is the way to go. That way, you won’t miss a beat, and you’ll be able to capture all the action without any delays. Just imagine missing the moment your furry friend jumps on the couch just because the retrigger time was set too high. No one wants that heartbreak!
Clip Length
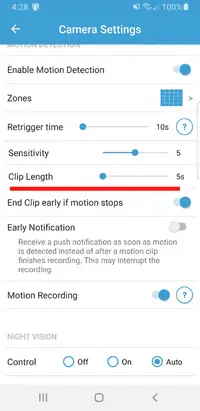
The clip length setting sets the number of seconds that the camera will record after it gets motion triggered.
I prefer a decent amount of time to get enough video to determine what is happening – around 20 seconds or so. However, it is essential to note that the longer time frame will cause the battery life to be shorter.
To help prolong your battery with a more extended clip length setting, be sure to turn on the “End Clip Early If Motion Stops” option.
Night Vision Settings
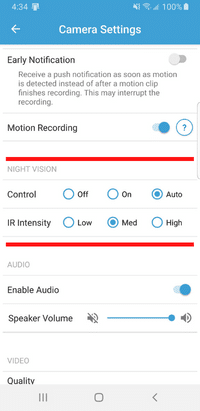
You’ve got a Blink camera with the ultimate party trick – night vision! Trust me, it’s the real deal and works like a charm when you set it to “Auto” mode. The camera’s got your back and will take care of the rest.
If you want to get fancy, you can tweak the IR intensity. But no worries, start with the medium setting and see where that takes ya. Have fun playing around with your new toy!
I wrote another entire article on Blink camera’s night vision settings here.
Audio Settings
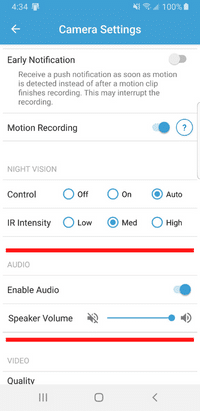
There are only a couple of different things that you can do with the Blink audio settings. Turn it off or on and set the speaker volume.
I would recommend turning the volume in the speaker down a bit because setting it at max value can cause some distortion in the audio.
Video Quality
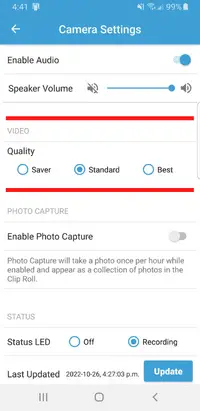
There are three video quality settings:
- Saver – 480p resolution
- Standard – 720p resolution
- Best – 1080p resolution
I recommend setting it to “Best” for best quality, but know that this takes more battery power when recording.
Other Things To Consider
Scheduling Features
One other thing that Blink allows you to do is scheduling specific blocks of time where the camera can be disabled.
An excellent example of when this is useful is if you have your kids playing in the backyard after school every day. You can easily schedule that time to automatically turn off motion detection so that the kids don’t accidentally trigger a recording when they play ball or ride their bikes around the yard.
Wifi
When installing your camera, you will need to ensure that you are putting it in place with a good wifi signal from your internet router. This will allow you to access and control your camera remotely.
If your wifi signal is too weak, you will have problems accessing and controlling your camera remotely and viewing any recordings you may have captured while away from home.
Best Position To Set Up A Blink Security Camera
Mounting your camera isn’t rocket science, but it requires a bit of planning to ensure you get the perfect shot. You want to find the sweet spot where you can see all the action while keeping your camera safe from sneaky intruders. Check out these rad tips for each type of camera:
Blink XT2 Or Blink Outdoor Camera Placement
So, you got yourself some sweet outdoor cameras, huh? Congrats! Just a heads up, make sure you mount ’em in a spot where they won’t be messed with by any shady characters like thieves or vandals. Everyone got time for that.
Also, remember that shadows can be a real buzzkill regarding your camera’s view. So, try to mount ’em where they will be allowed. The backyard, front porch, side of the house, or roof are all great options. You can even take the show on the road and mount ’em on your RV or boat for a change of scenery. Get creative!
Look at our Blink outdoor camera review here as well.
Blink Indoor Camera Placement
These cameras were made to live indoors, so you want to ensure they’re in a spot where people can’t mess with them. Just a heads up, placing them near a window can sometimes cause a glare, which makes it hard to see what’s going on. Try to avoid that if you can.
But don’t worry, they’re tiny, and you can put ’em anywhere in your crib. Many peeps stick ’em on a shelf or in a cabinet to keep an eye on what’s going on in the room they’re watching. So, it’s perfect for your bedroom, office, garage, or even the baby’s nursery!
Blink Mini Camera Placement
These cameras are tiny, so you can easily hide them almost anywhere. They are very discreet and won’t draw any attention to themselves at all. I recommend putting them in locations where you know they will get a lot of use, such as in the kitchen, living room, or even the hallways in your home.
Please don’t put these cameras out in plain sight where people can easily see them, though, because doing so will only draw attention to them. This is more of a security/surveillance camera than a nanny cam. If the intruder knows a security camera is in the house, they might try to remove it or at least tamper with it.
Conclusion
Blink cameras are straightforward to set up, and the settings available are simple to navigate through and change on the fly if needed. They give you great peace of mind knowing that you can check in on your family anytime and know that they are safe and secure when you are away at work or on vacation. I highly recommend them.
