

Z-Wave is not natively compatible with Apple HomeKit, and it never will be – Apple has never added Z-Wave support to the HomeKit spec, and no Z-Wave chip has ever passed Apple’s MFi certification. If you want Z-Wave devices showing up in the Home app and responding to Siri, you need a bridge in the middle – something like Homebridge, Home Assistant, Hubitat, or Homey – to translate between the two protocols.
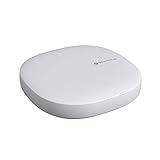
The good news: this is a solved problem, and it has been for years. Several hub options bridge the gap reliably, and with Matter increasingly gluing ecosystems together, the path from Z-Wave to HomeKit keeps getting cleaner.

Why Z-Wave and HomeKit Don’t Speak the Same Language
HomeKit is Apple’s smart home framework – software that runs on iOS, iPadOS, and macOS and talks to accessories over Wi-Fi, Bluetooth, and Thread. Z-Wave is a separate radio protocol entirely: a sub-1GHz mesh network that has nothing to do with any transport Apple supports. They’re not competing standards so much as two systems that were never introduced to each other.
Z-Wave devices form a mesh where every powered node relays for its neighbors. Per a peer-reviewed academic analysis of the underlying ITU-T G.9959 standard Z-Wave runs on, a network tops out at 232 nodes across a maximum of four hops, with every device assigned an 8-bit Node ID inside a 32-bit network-wide Home ID. None of that means anything to an iPhone – Apple’s radios don’t listen on the frequency Z-Wave uses, and there’s no firmware update coming that changes that.
The other half of the wall is what HomeKit demands before it will talk to anything. Every HomeKit accessory has to complete Apple’s HomeKit Accessory Protocol (HAP) pairing handshake: a modified Secure Remote Password exchange using SHA-512 and a 3072-bit modulus, followed by a Curve25519 key exchange, HKDF-SHA-512 session-key derivation, and ChaCha20-Poly1305 encryption on every packet after that, per Apple’s own HomeKit Accessory Protocol specification. That is a specific cryptographic stack built into HomeKit-certified silicon. No Z-Wave chip has ever implemented it, and Apple has never certified one to try.
A bridge solves both problems at once. It joins your Z-Wave mesh as an ordinary controller node, then runs the HAP handshake on the HomeKit side so your iPhone sees a device that looks fully native. Neither protocol has to change – the bridge just speaks both languages fluently. For the wider picture of what does and doesn’t show up in Apple’s ecosystem, see our HomeKit compatible devices guide.
Hub Options for Bridging Z-Wave to HomeKit
There are a handful of hubs that handle the Z-Wave-to-HomeKit translation reliably in 2026. They fall into three categories: a dedicated hardware bridge, software-only bridges, and full home automation platforms that happen to include HomeKit as one of their outputs.
Thinka Z-Wave
Thinka is the only Apple MFi-certified Z-Wave bridge. It connects directly to HomeKit without any extra software layer, supports 3,300+ Z-Wave accessories from 600+ brands, and uses a 700-series Z-Wave chip. Setup happens entirely in the Apple Home app. It is the cleanest experience if your entire goal is Z-Wave in HomeKit and nothing else. The downside: it’s expensive (around $200) and does only this one job.
Hubitat Elevation C-8 Pro
The Hubitat Elevation C-8 Pro is a local-processing home automation hub with built-in Z-Wave 800 LR, Zigbee 3.0, Thread, Matter 1.5, and native HomeKit support. You pair your Z-Wave devices to Hubitat, then expose them to HomeKit through the built-in integration. Everything runs locally – no cloud dependency, no subscription. This is the best option if you want serious automation capability alongside HomeKit visibility. See also: Hubitat HomeKit integration guide.
Home Assistant
Home Assistant is the most powerful, and most flexible, path. You add a Z-Wave USB stick – the Aeotec Z-Stick 7 is the standard choice – plug it into a Raspberry Pi or dedicated hardware, run the Z-Wave JS integration, then enable the HomeKit Bridge integration to expose your devices to Apple Home. It takes more setup than Thinka or Hubitat, but the automation capabilities are unmatched and the hardware cost is lower.
Homebridge
Homebridge takes the DIY route a step further. It’s a free, open-source Node.js server whose only job is emulating HomeKit accessories – no separate home automation platform required. Pair it with the community Z-Wave JS UI plugin and the same Aeotec Z-Stick 7 used above, and Homebridge exposes every device on your Z-Wave network straight to Apple Home. It’s lighter weight than running full Home Assistant if bridging to HomeKit is genuinely all you want, though you give up Home Assistant’s dashboards and broader automation engine in exchange.
Homey Pro
Homey Pro 2026 supports Z-Wave, Zigbee, Thread, and 50,000+ devices, and bridges them all to Matter and HomeKit through its Matter Bridge app. It’s a strong option if you have a mixed-protocol home and want one hub to handle everything. More expensive than Home Assistant DIY but cleaner to manage.
Matter as the Modern Bridge Path
Matter is the newer home automation standard that HomeKit, Google Home, and Alexa all support natively. It doesn’t include Z-Wave – Matter runs over Wi-Fi and Thread – but the relevant development is that Z-Wave hubs increasingly double as Matter bridges.
When a hub like Hubitat or Homey runs as a Matter bridge, it presents your Z-Wave devices to HomeKit as Matter accessories. Apple Home treats them like native Matter devices. The practical result is the same – your Z-Wave switch appears in the Home app – but the architecture is cleaner than older HomeKit Bridge approaches, and it works across any Matter-compatible platform simultaneously.
Silicon Labs (the company behind most Z-Wave chips) has published bridge SDK code to make this pattern easier to implement, and the Z-Wave Alliance has been pushing a formal Z-Wave-to-Matter bridge specification so certified hubs can expose Z-Wave devices as Matter endpoints without custom engineering. Expect more hubs to ship with Matter bridge capability through 2026 and beyond. For a deeper look at how HomeKit connects to non-native devices, see our HomeKit bridge explainer.
How to Connect Z-Wave Devices to Apple HomeKit
The steps below cover the Home Assistant / Homebridge path (most common for DIY users) and the Hubitat path (better for those who want a polished out-of-the-box experience).
Choose your hub and hardware
For Home Assistant or Homebridge: pick up an Aeotec Z-Stick 7 (USB Z-Wave controller) and a Raspberry Pi 4 or a dedicated Home Assistant device like the Home Assistant Green. For Hubitat: the C-8 Pro has Z-Wave built in – no additional hardware needed.
Install and configure Z-Wave on your hub
Home Assistant: install the Z-Wave JS integration (Settings > Devices & Services > Add Integration > Z-Wave JS). Homebridge: install the Z-Wave JS UI plugin through the Homebridge Config UI X plugin manager. Hubitat: go to Apps > Z-Wave Details, then pair devices through the Hubitat interface.
Pair your Z-Wave devices
Put each Z-Wave device into inclusion mode (usually a button press sequence – check your device manual). Add it through the hub interface. Confirm the device shows up with the correct device type before moving on.
Enable the HomeKit bridge integration
Home Assistant: go to Settings > Devices & Services > Add Integration > HomeKit Bridge, then select which devices to expose. Homebridge: no extra step – Homebridge itself is the HomeKit bridge, so paired Z-Wave devices appear automatically. Hubitat: go to Apps > HomeKit Integration and select devices to share. Each path generates a QR code or pairing code.
Add the bridge to Apple Home
Open the Apple Home app, tap the + icon, then Add Accessory. Scan the QR code shown by your hub, or enter the 8-digit code manually. Confirm you are adding an uncertified accessory (for Home Assistant/Homebridge) or follow the standard pairing flow (for Hubitat/Thinka). Your Z-Wave devices will now appear in Apple Home.