IFTTT dropped its native HomeKit channel in 2020. If you landed here expecting a clean IFTTT-to-HomeKit toggle, that ship has sailed. What still works – and what most people actually want in 2026 – is covered below.

The Honest State of IFTTT + HomeKit in 2026
IFTTT used to have a direct HomeKit service. It was cut years ago and has not come back. On top of that, IFTTT has gutted its free tier down to 2 applets. Pro runs $2.99/month for 20 applets; Pro+ is $8.99/month for unlimited. For most home automation use cases, that pricing is hard to justify when Apple Shortcuts does the same job for free.
That said, there is still a legitimate use case for IFTTT with HomeKit: you have a device that works with IFTTT but has no HomeKit or Shortcuts support. For that specific scenario, the Homebridge workaround below still functions – it just involves more moving parts than it used to.
The 2026 Answer: Use Apple Shortcuts Instead
If your device supports HomeKit, you do not need IFTTT at all. The Shortcuts app on iOS and macOS handles conditional automations, multi-step sequences, and cross-app triggers natively – all the things IFTTT used to be necessary for.
A Shortcut can run automatically when you arrive home, when a HomeKit sensor fires, at a specific time, or when you tap a widget. You can chain multiple actions, add conditionals, and run scripts on specific devices. It is the same functionality IFTTT sold you on in 2018, and it costs nothing.
Home Assistant is the other serious option if you want something more powerful – it connects to almost everything and runs locally with no subscription. We have a Home Assistant vs Apple HomeKit comparison if you want to weigh the tradeoffs.
How to Set Up a Shortcuts Automation for HomeKit
This covers creating a time-based or trigger-based automation that controls HomeKit devices – the most common use case people previously used IFTTT for.
Open the Shortcuts app and go to Automation
Tap the Automation tab at the bottom of the Shortcuts app. Tap the + in the top right to create a new personal automation.
Choose your trigger
Pick what starts the automation: Time of Day, Arrive/Leave a Location, a HomeKit accessory state change (e.g. a motion sensor), an app being opened, or a number of other options. For replacing an IFTTT applet, Time of Day and Location triggers cover most cases.
Add your HomeKit action
Tap Add Action and search for “Home”. You will see options to control scenes, individual accessories, or run full automation groups. Pick the device and the state you want (on/off, brightness level, lock/unlock, etc.).
Disable the confirmation prompt
By default iOS asks you to confirm before running. Toggle off “Ask Before Running” to make it fire automatically without interaction. You can re-enable this later if something misfires.
Test it
Tap Done and then manually trigger the condition to confirm it fires correctly. Check the Shortcuts app run history if nothing happens – it logs every automation attempt with success/failure status.
The Homebridge Workaround (For IFTTT-Only Devices)
If your device only supports IFTTT and has no HomeKit, Shortcuts, or Home Assistant integration, this is your path. Homebridge runs a local server that exposes virtual switches to HomeKit. The homebridge-ifttt plugin maps those switches to IFTTT Webhook triggers, so flipping a switch in the Home app fires an IFTTT applet.
Fair warning: the homebridge-ifttt plugin (npm: homebridge-ifttt) has not had a meaningful update since 2021. It still installs and runs, but it is not actively maintained. If it breaks on a future Node.js or Homebridge version, you are on your own. Use it knowing that.
You need a computer or a Raspberry Pi running continuously to host Homebridge. A Pi is the right call for this – a dedicated always-on device that draws almost no power. The CanaKit Raspberry Pi 4 Starter MAX Kit is a complete package (Pi 4, 64GB card, case, power supply) and is the easiest way to get started.
Set Up IFTTT Webhooks First
Before installing Homebridge, create the IFTTT Webhook applets that will actually control your device. You need one applet per action (on and off are separate triggers).
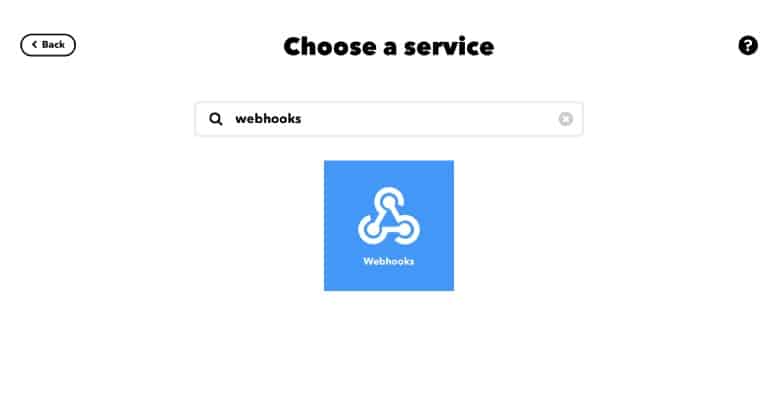
Create an IFTTT Webhook applet for the ON action
Log in to IFTTT and click Create. For IF This, search for Webhooks and choose “Receive a web request”. Name the trigger something memorable – e.g. bedroom_light_on. For Then That, connect your device service and choose the ON action.
Create a second applet for the OFF action
Repeat the same process with a trigger named bedroom_light_off, pointing to the OFF action on your device. You need both applets for a working on/off switch in HomeKit.
Copy your Webhooks API key
Go to Explore, search for Webhooks, and click Documentation. Your personal key is shown at the top of the page. Copy it – you will need it for the Homebridge config.
Install Homebridge
Installation steps vary by platform. The Homebridge website has OS-specific guides. The short version: install Node.js, then install Homebridge and its UI, then install the IFTTT plugin.
On Mac (run these in Terminal):
sudo npm install -g homebridge homebridge-config-ui-x
sudo npm install -g homebridge-ifttt
On Windows (run in Command Prompt as Administrator):
npm install -g homebridge homebridge-config-ui-x
npm install -g homebridge-ifttt
To make Homebridge launch automatically on startup:
sudo hb-service install   # Mac
hb-service install        # Windows
Configure the IFTTT Plugin
Open the Homebridge UI at http://localhost:8581 (default login: admin / admin). Go to the Config tab and add the following inside the platforms array, replacing the makerkey with your Webhooks API key:
{
    "platform" : "IFTTT",
    "name" : "IFTTT",
    "makerkey" : "YOUR_WEBHOOKS_KEY_HERE",
    "accessories" : [
        {
            "name" : "IFTTT",
            "buttons" : [
                {
                    "caption" : "BedroomLight",
                    "triggerOn" : "bedroom_light_on",
                    "triggerOff" : "bedroom_light_off"
                }
            ]
        }
    ]
}
The caption is what appears in the Home app. The triggerOn and triggerOff values must exactly match the webhook trigger names you created in IFTTT. Add more objects inside buttons for additional devices.
Restart Homebridge from the top-right menu in the UI after saving.
Add Homebridge to the Home App
- Open the Home app and tap + then Add Accessory.
- Tap “Don’t Have a Code or Can’t Scan?”
- Select Homebridge from Nearby Accessories.
- If prompted for a PIN, find it in the Homebridge UI Config tab – it is the 8-digit number in the bridge section.
Once paired, your IFTTT-mapped switches appear as accessories in the Home app. There will be a 1-3 second delay when you trigger them – that is the Webhook round-trip to IFTTT’s servers, unavoidable by design.
Is the Homebridge-IFTTT Setup Worth It in 2026?
Only if your device is genuinely stuck in IFTTT-only territory with no other integration path. The setup works, but you are maintaining three moving parts (Homebridge server, an unmaintained plugin, and an IFTTT subscription) to do something a $5 smart plug with native HomeKit support would handle out of the box.
Before committing to this, check whether your device has a HomeKit bridge option or a Home Assistant integration. Either path is cleaner and more reliable long-term.
Does IFTTT work with HomeKit directly?
No. IFTTT dropped its native HomeKit service in 2020. The only way to connect IFTTT to HomeKit now is through Homebridge, which runs a local server and exposes virtual switches that IFTTT Webhooks can trigger.
Can I use IFTTT to control non-HomeKit devices from the Home app?
Yes, with Homebridge and the homebridge-ifttt plugin. Homebridge creates virtual switches in HomeKit that, when toggled, fire IFTTT Webhook triggers pointing at your device. The device needs to support IFTTT for this to work.
What is a good alternative to IFTTT for HomeKit automations?
Apple Shortcuts handles most IFTTT use cases for free – time-based triggers, location triggers, accessory state triggers, and multi-step sequences. Home Assistant is the more powerful option if you need local control and broader device compatibility.