
HomeKit garden automation in 2026 is genuinely useful – not just a party trick. You can water on a schedule, skip irrigation when it rained, trigger lights at sunset, and control everything from your iPhone without buying into a proprietary ecosystem. Here’s what actually works and how to set it up.
What You Can Automate With HomeKit in the Garden
- Irrigation and watering – on a schedule or triggered by soil conditions
- Outdoor lighting – sunset/sunrise automations, motion triggers, color scenes
- Outdoor smart plugs – power garden lights, water features, or pond pumps on a timer
- Weather monitoring – temperature, humidity, rain detection feeding into Shortcuts automations
Smart Irrigation: The Best Native HomeKit Option
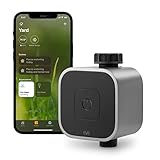
If you want to water your garden from the Home app without any middleware, Eve Aqua is the one to buy. It screws directly onto a standard hose spigot, pairs via Bluetooth/Thread, and needs no hub beyond a HomePod mini or Apple TV. Set a fixed watering schedule in the Eve app, then let Shortcuts handle weather-based skips.
The only real limitation: Eve Aqua doesn’t have native weather-skip intelligence baked in. You either set a fixed schedule and leave it, or build a Shortcuts automation that checks Apple’s weather data and cancels the run if rainfall is expected. It takes about 10 minutes to set up and works reliably once it’s done.
If you have a multi-zone in-ground system, Rachio 3 is the better fit – it does have native HomeKit support (no Homebridge needed on the current firmware), plus its own weather intelligence that skips watering automatically when rain is forecast.
How to Set Up Eve Aqua With HomeKit
Attach Eve Aqua to your spigot
Thread Eve Aqua onto any standard 3/4-inch garden hose tap. No tools needed – hand-tight is enough. Connect your hose to the other end.
Add to the Home app
Open the Home app, tap the + icon, and scan the HomeKit QR code on the Eve Aqua unit. It pairs via Bluetooth in under a minute.
Set a watering schedule
Open the Eve app (free, separate from Home app) and create a schedule – days of the week, start time, duration. The schedule runs even when your phone isn’t nearby.
Add a weather-skip automation in Shortcuts
In the Shortcuts app, create a new automation triggered at your watering start time. Add a condition: if precipitation is above a threshold in your location, run a HomeKit action to turn Eve Aqua off. This gives you the weather-skip the device lacks natively.
Enable remote access
For remote control when away from home, you need a home hub – HomePod mini, HomePod, or Apple TV 4K. Once set up, you can start or stop watering from anywhere.
Outdoor Smart Plugs for Garden Power
An outdoor smart plug handles anything that just needs to be switched on and off – garden lights, a pond pump, a string of patio LEDs, a water feature. The Meross outdoor smart plug is the practical choice here: waterproof, two independently-controlled outlets, native HomeKit support, and cheap enough that you won’t agonize over the purchase.
Set it up in the Home app, drop it into a scene or automation (sunset = on, sunrise = off), and forget about it. The two-outlet design means you can run two separate things on independent schedules from one plug – useful if you have lights on one side of the garden and a water feature on the other.
Eve Energy Outdoor is the premium option if you want Thread connectivity and local-only processing (no cloud dependency). It’s more expensive but eliminates the “cloud is down” problem entirely.
Outdoor Lighting With HomeKit
Philips Hue remains the easiest path if you want full color control, dimming, and reliable automations. The Hue Outdoor Lily stake lights are purpose-built for garden use – weatherproof, stake-mount, full color spectrum, and they talk to the Hue Bridge which then surfaces in HomeKit.
The Hue ecosystem is worth it if you’re already in it, or plan to be. If you just want basic on/off outdoor lighting controlled by HomeKit, an outdoor smart plug with a standard weatherproof fixture costs a fraction of the price and works just as well for simple automations.
For motion-triggered security lighting, check out the best smart outdoor floodlights – several options there include native HomeKit support.
Weather Monitoring for Smarter Automations
The Netatmo Smart Weather Station still works with HomeKit in 2026 and is a solid option if you want real local weather data in the Home app – temperature, humidity, barometric pressure, and rain detection from a sensor actually in your garden, not from Apple’s nearest weather station three miles away.
Once Netatmo is in your Home app, you can build automations like: if outdoor temperature drops below 4C, turn off irrigation (frost protection). Or: if humidity has been above 90% for 24 hours, skip the morning watering run. That kind of thing isn’t possible with Apple’s built-in weather data alone – you need a local sensor for the accuracy to matter.
For a simpler setup, Eve Weather is a Bluetooth/Thread sensor that lives outdoors, requires no hub, and feeds temperature, humidity, and air pressure straight into HomeKit. No camera, no display, no app subscription – just data in the Home app ready to trigger automations.
Using Shortcuts for Complex Garden Automations
The Home app handles basic automations fine – time-based triggers, sunrise/sunset, motion detection. For anything more sophisticated, the Shortcuts app is where it gets interesting. You can chain conditions: water only if it hasn’t rained, AND the temperature is above 10C, AND it’s a weekday. That’s a three-condition automation that would require a dedicated controller in any other ecosystem.
Shortcuts also lets you build personal automations that run without confirmation – critical for garden tasks you don’t want to manually approve every morning at 6am. Set the automation as “run automatically” when you create it and it fires silently in the background.
The main constraint with Shortcuts garden automations is that your iPhone needs to be at home for location-based triggers, and you need a home hub for remote-triggered automations. If you don’t have a HomePod or Apple TV running, some automations won’t fire when you’re away. Worth knowing before you build a complex setup around it.
For more on linking non-native devices into your automations, the HomeKit Bridge guide covers how to pull in devices that don’t speak HomeKit natively.