The Govee Dreamview branding is gone – the current product is the Govee Envisual TV Backlight T2 (H605C), and the installation process has changed enough that the old guides floating around the internet will send you in circles. Here’s what you actually need to do.

Before You Start: TV Compatibility Check
The T2 only works with flat-backed TVs. Curved TVs are not supported – the adhesive strips need a flat surface and the camera mount won’t sit correctly on a curved panel. VESA mount compatibility is fine. If you have a Samsung Frame TV or any set with an unusual back profile, check the back panel clearance before you commit.
Also confirm you have a 2.4 GHz Wi-Fi network available. The T2 does not support 5 GHz. If your router is dual-band, make sure you know which network is which before you start the app setup – it will save you a lot of frustration.
What’s in the Box
Everything you need is included – you do not need to buy anything separately. The kit contains the LED strip (11.8 ft, designed for 55-65″ TVs), the dual-camera unit, a control box, two separate power cables (one for the strip, one for the camera unit), mounting clips for the strip corners, alcohol prep pads, and a set of orange foam calibration stickers.
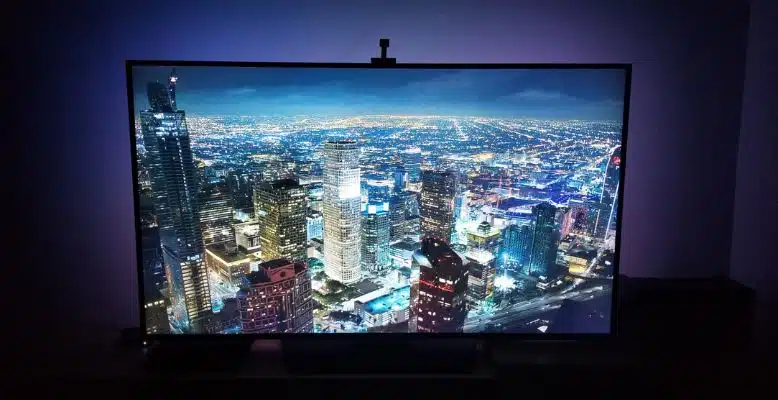
The T2 upgraded from the T1’s single camera to dual cameras. Both lenses capture different zones of the screen simultaneously, which is the whole reason color sync is more accurate than the older DreamView models.
How To Install Govee Envisual TV Backlight T2
Clean the back of the TV with the included alcohol pad
Wipe down the area where the strip will sit – usually about an inch in from the edge all the way around. Let it dry fully before moving on. Dust and oils are why strips peel off after a few weeks, so don’t skip this.
Peel the adhesive backing and press the LED strip in place
Start from one corner and work your way around. The strip comes in four sections joined by pre-wired corner connectors – you don’t have to cut anything. Press each section firmly against the back panel for at least 10 seconds. Use the included mounting clips at the corners for extra hold.
Mount the camera unit at the top-center of the TV
The T2 camera only mounts at the top – not the bottom. The counterweight arm hooks over the top edge and rests against the back of the TV. Position it centered so both lenses have an unobstructed view of the screen. Pull the plastic film off the lenses (easy thing to miss).
Connect both power cables to the control box
There are two separate power cables: one for the LED strip and one for the camera unit. Both plug into the control box. The control box then connects to power via its own adapter. Position the control box somewhere accessible near the TV.
Download the Govee Home app and add the device
The app you want is called Govee Home (not the old Govee app). Open it, tap the + icon, and search for H605C. Follow the on-screen pairing prompts. When it asks for Wi-Fi, make sure you’re selecting your 2.4 GHz network – the T2 will not connect to 5 GHz.
Run the calibration process
Once paired, go to the device settings and tap Calibration. The app displays the calibration screen on your TV and tells you exactly where to place the seven orange foam stickers. The key step with the T2’s dual cameras: both cameras need to capture their assigned calibration dots. If the app flags a camera error, nudge the camera unit slightly left or right until the dots from both lenses register correctly. Remove the foam stickers when calibration completes.
Dial in your settings
Head into the Govee Home app settings for the T2 and adjust saturation and white balance to taste. For most setups the defaults are a little oversaturated. The DreamView scene mode (which syncs other Govee lights in the room to match the TV) is also in here if you want to set it up.
Troubleshooting Common Problems
Strip not sticking: The adhesive needs a clean, dry surface. If you skipped the alcohol wipe or didn’t let it dry, the strip will start lifting within days. Peel it back, clean again, and re-press. The included clips at the corners are load-bearing – use them.
Can’t connect to Wi-Fi: The T2 will only connect to 2.4 GHz. If pairing keeps failing, log into your router, find the 2.4 GHz network name, and make sure your phone is connected to that band during setup – not the 5 GHz one.
Calibration keeps failing: Usually a camera position issue. Make sure the unit is centered and both lenses are unobstructed. Check that no other bright light sources are hitting the screen during calibration. Dark room, TV on, foam stickers placed exactly where the app tells you.
Colors look washed out or wrong: Try adjusting saturation in the Govee Home app first. If that doesn’t sort it, a clip-on ND filter on the camera lens – like this Neewer variable ND filter – reduces the light input and can noticeably improve color accuracy. It’s a cheap fix that a lot of people swear by.
Related Guides
If you’re still setting up or having specific issues, these go deeper on particular parts of the process:
- Govee Immersion setup guide – full app setup walkthrough
- Govee Immersion calibration guide – troubleshooting the calibration process in detail
- Govee Envisual TV Backlight review – full review of the T2 if you’re still deciding
- Does Govee work with HomeKit? – if you’re in the Apple ecosystem